Managing Grouper Groups
CUIT uses Grouper groups to control group access to applications and resources. Some examples include:
- LionMail Groups (Google Groups)
- Wiki groups
- ...and more
CUIT will create a Grouper group for a given application or resource, and then assign one or more designated individuals as administrators. The group administrators can then manage membership using the Manage Google Group website. Members of groups are generally those who will be assigned access to the specific application or resource associated with the group.
How to name your Grouper group
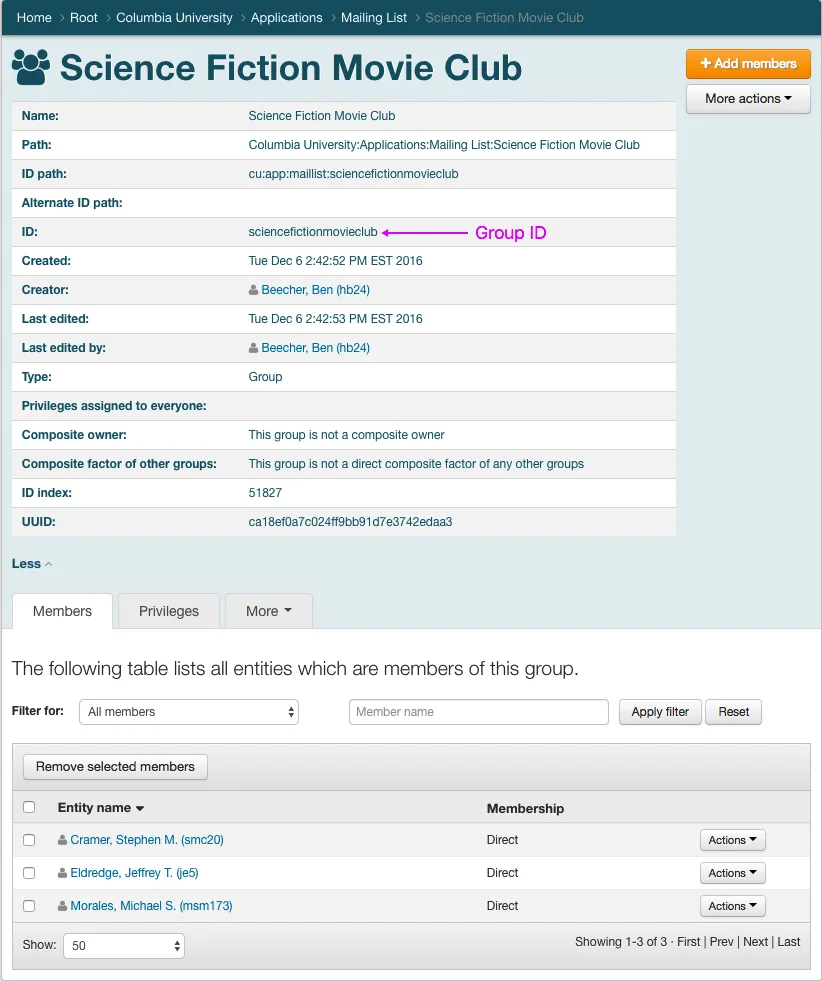
Every Google Group Grouper group has a Group Name (short proper name) and a Group ID (four+ characters that reflect the purpose of the group). The examples in this document use the Group Name “Science Fiction Movie Club” and the Group ID sciencefictionmovieclub.
Group ID guidelines
The Group ID becomes the group’s email address; in this example, the email address is [email protected].
- Must begin with a letter or number and be at least four characters long
- May contain letters, numbers, dashes, and underscores, but they may not contain any spaces
- We encourage people to suggest a Group ID that is completely lowercase (e.g. sciencefictionmovieclub), but that is not a requirement. However, for training groups, we always use mixed case (e.g. AlumniOffice) Group ID.
- Must not match an existing UNI, username, email alias, or simple mailing list - we will let you know if there is a duplicate and will request another Group ID suggestion.
Member restrictions
- An external user is someone who has no UNI, e.g. [email protected], or someone who prefers to use their non-Columbia email address, e.g. [email protected]. An external user is specified by entering the person's first name, last name, and email address.
- LionMail groups (Google groups) may contain UNIs, external users, and other groups.
Grouper Guides
Go to the Grouper web application, where you'll find the user interface.
There are several ways to select the group you want to update from the Grouper home page.
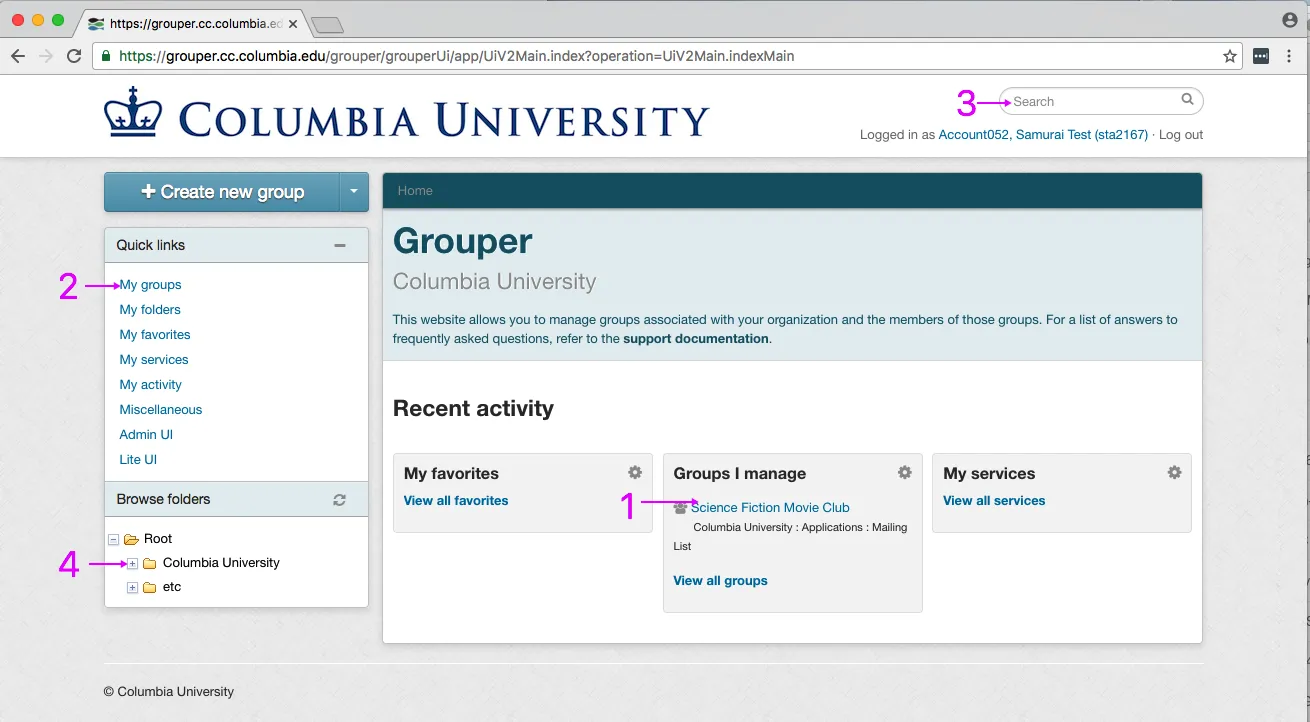
- If the desired group is included under "Recent activity" you can click on the Group Name (Science Fiction Movie Club).
- You can click "My groups" under the "Quick links" navigation bar to see all the groups you own, then click on the desired Group Name.
- Enter the Group Name (Science Fiction Movie Club) or the Group ID (sciencefictionmovieclub) in the Search field to find the desired group.
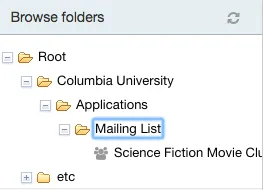
- Use the "Browse folders" navigation bar to find the desired group.
- Click the plus sign next to "Columbia University" to see the folders it contains.
- Click the plus sign next to "Applications" to see the folders it contains.
- Click the plus sign next to the desired folder (Access, Google, Mailing List) to see the folders and groups contained in that folder. Training and Wiki are folders inside the Access folder.
- Click the desired Group Name (Science Fiction Movie Club.
Click "More" to display detailed information about your group.
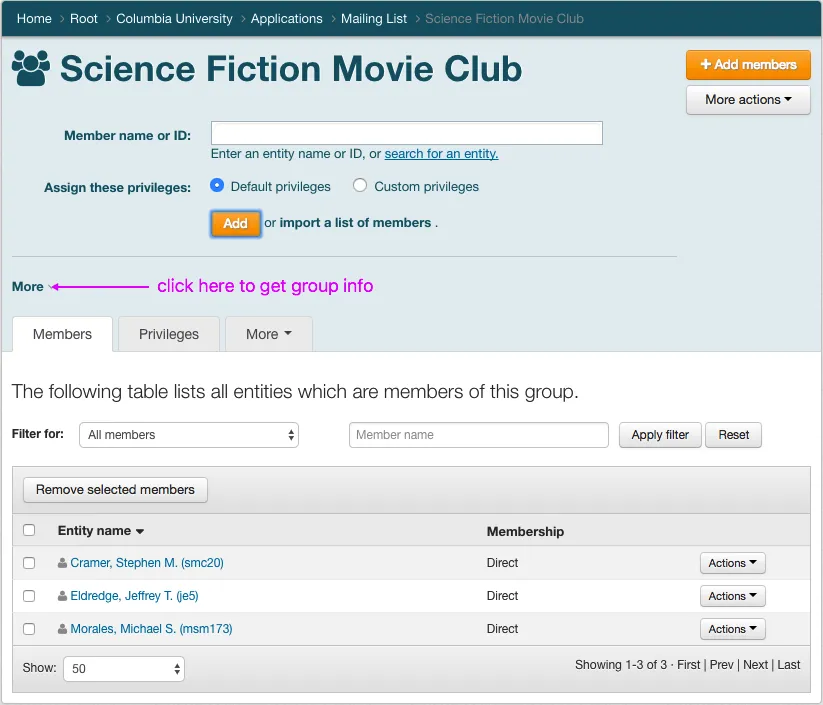
Group info includes the Group ID and other useful information.
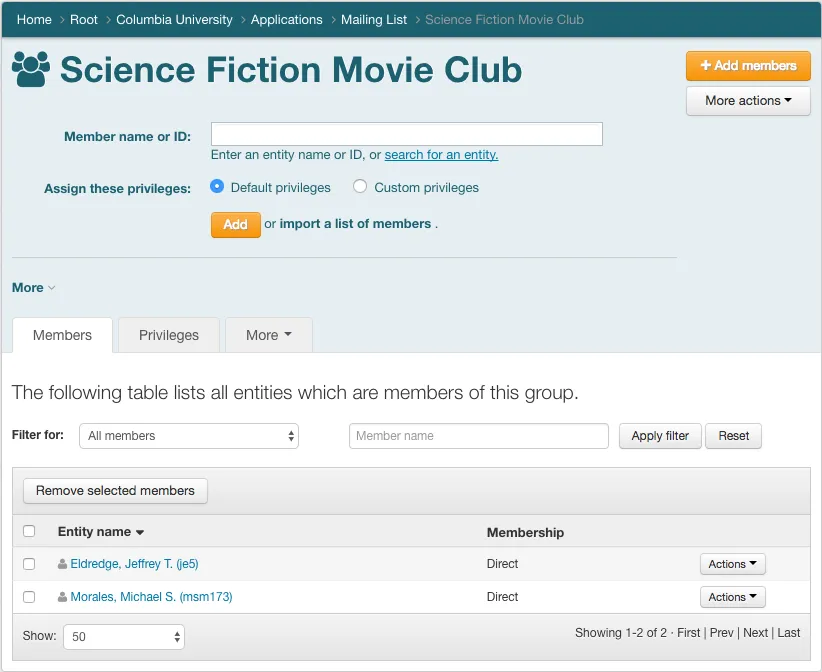
To add a UNI as group member click the "Add Members" button in the upper right corner.
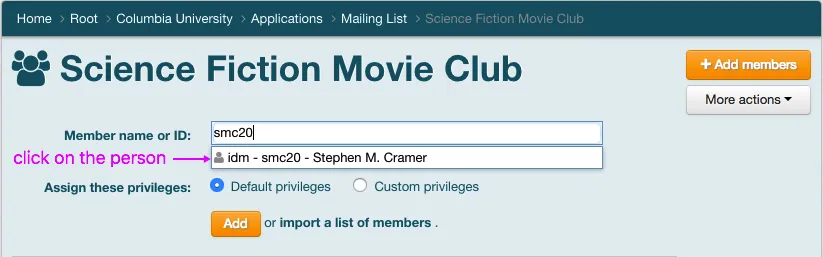
Type the UNI of the person you want to add. You will see a list of matching people in a drop-down menu. Click on the person in the drop-down menu.
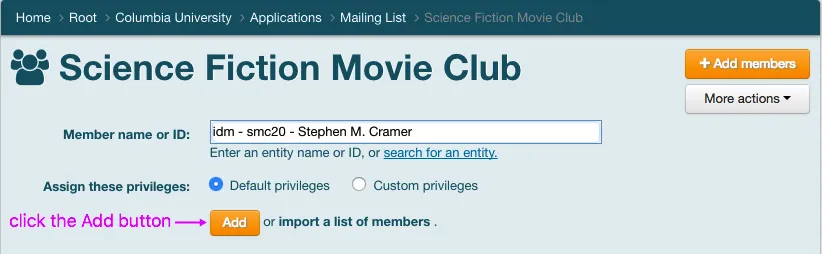
Click the "Add" button to add this person to the group.
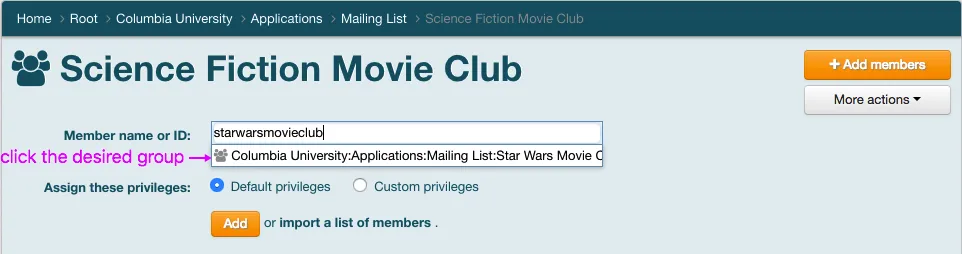
To add another group as a member of the currently selected group, click the "Add Members" button in the upper right corner. Type the Group Name or the Group ID of the group you want to add. You will see a list of matching groups in a drop-down menu. Click on the desired group in the drop-down menu.
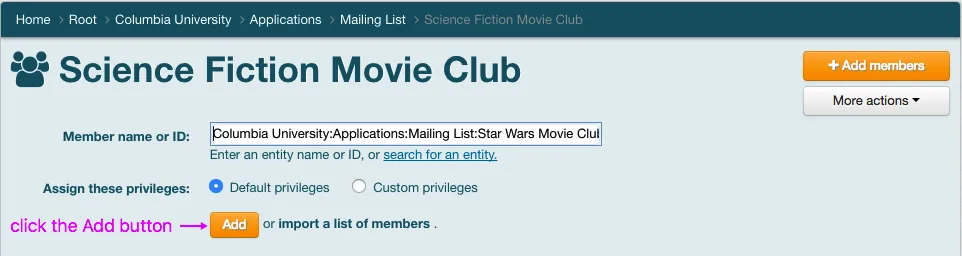
Click the "Add" button to add this group as a member of the group.
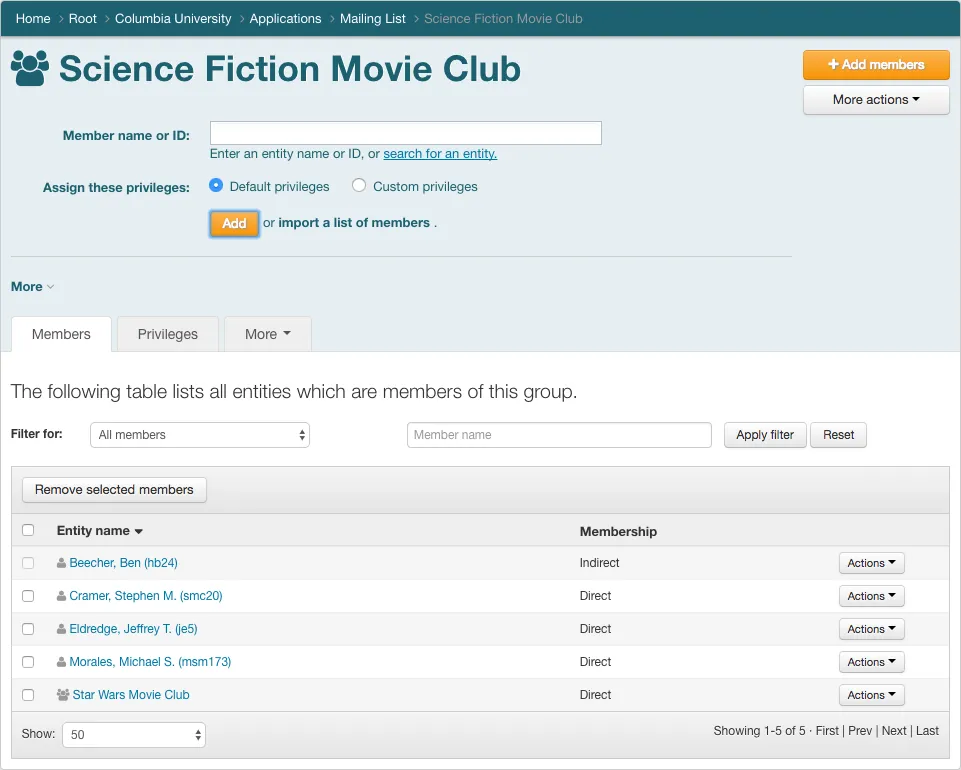
You can see that "Star Wars Movie Club" is now a member of "Science Fiction Movie Club" and the members of "Star Wars Movie Club" are displayed as indirect members of "Science Fiction Movie Club."
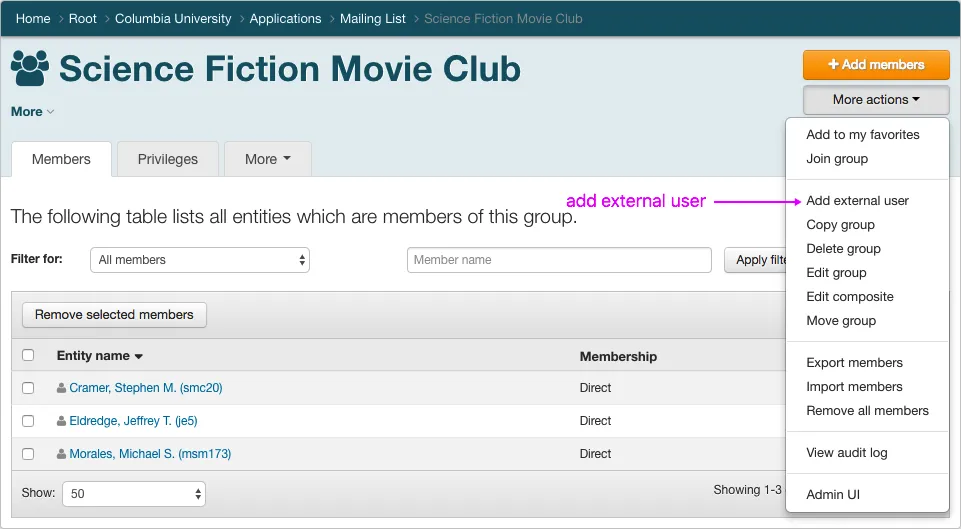
(This section currently applies only to mailing list groups and LionMail groups/Google groups; external users cannot be added to other types of Grouper groups.)
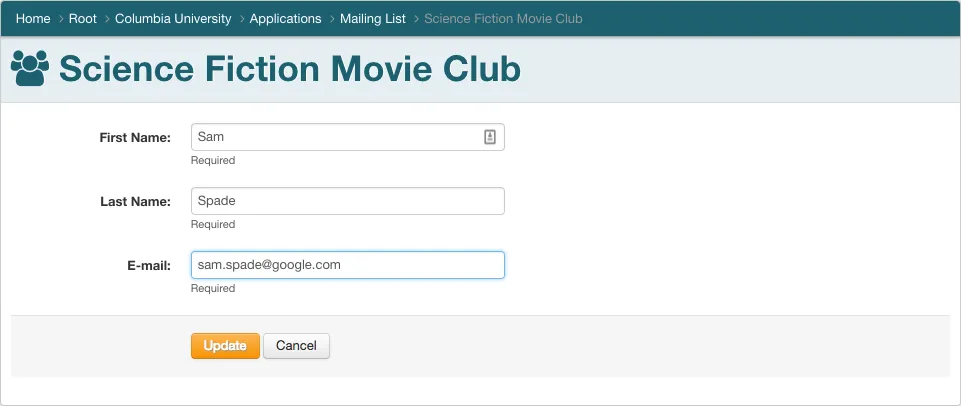
To add an external user as a group member click the "More Actions" menu in the upper right corner, then click "Add external user" from the drop-down menu.
Enter the external user’s first name, last name, and email address, then click the "Update" button. The external user will be displayed in the list of group members.
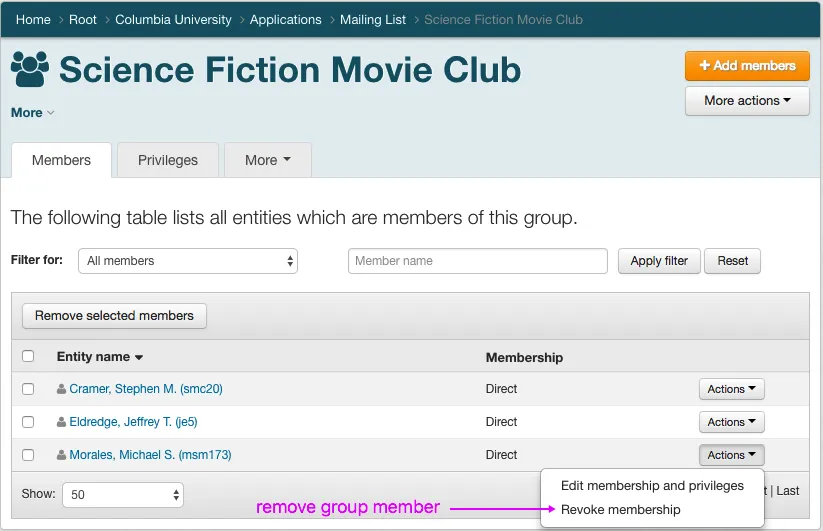
Click the "Actions" menu next to the member you want to remove, then click "Revoke membership" to remove that member from the group.
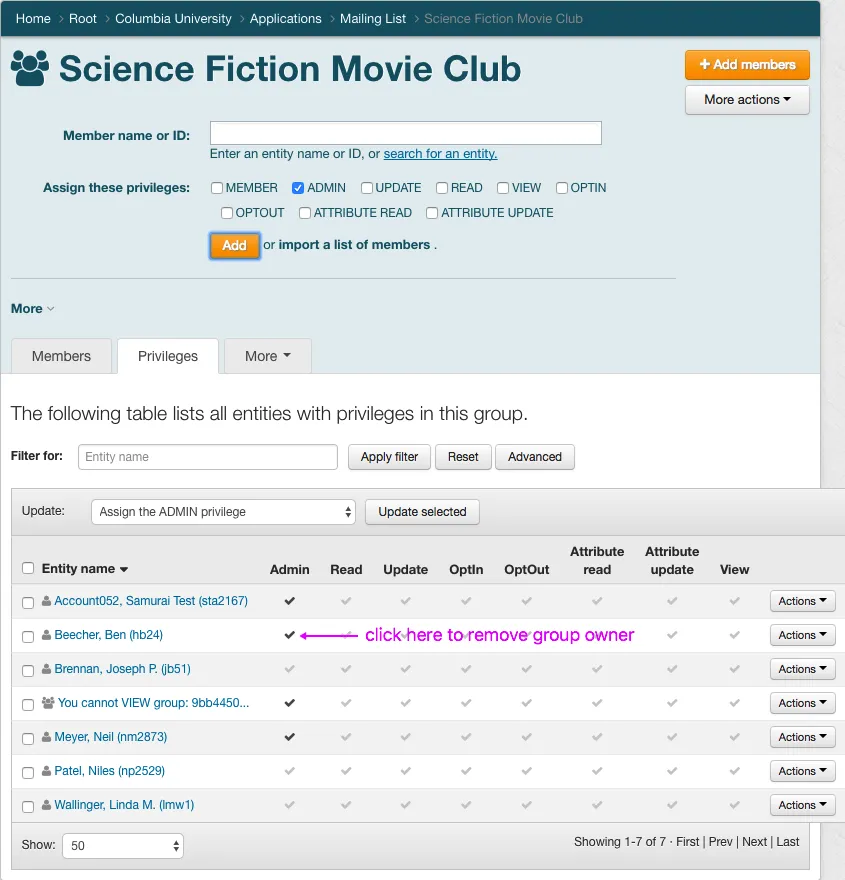
To add a group administrator, you need to give someone the Admin group privilege. Click on the privileges tab to see current privileges for your group.
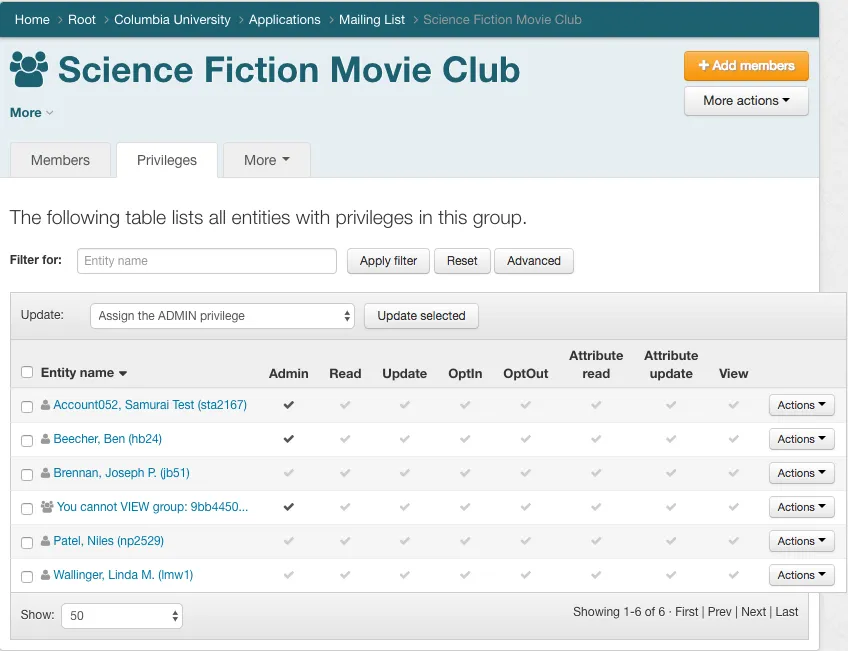
Make sure you are in the Privileges tab of the desired group. Click the checkmark next to a person's name to remove that person's Admin privileges.