Advanced Guides to CUSpider (Parker & Reilly)
Modifying Settings in CUSpider (Parker & Reilly)
Even though CUSpider loads the Infosec-recommended settings by default, you can customize Spider's settings, save those customizations to a settings file, and load them for your scan.
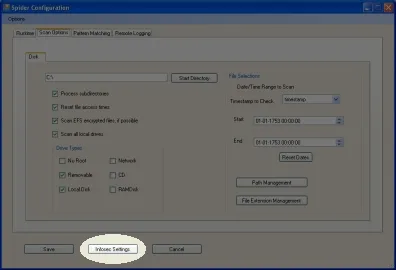
Just click on Settings to pull up the Spider Configuration dialog box where you can make the changes. Familiarize yourself with what each setting does in the overview below.
Spider Configuration Dialog Overview
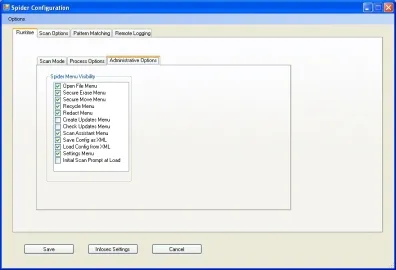
This tab and it's sub-tabs control how the Spider window displays and operates before, during, and after a scan. The Administrative Options tab contains a checklist of menu options that can be enabled or disabled.
This tab controls where and what types of files it will scan.
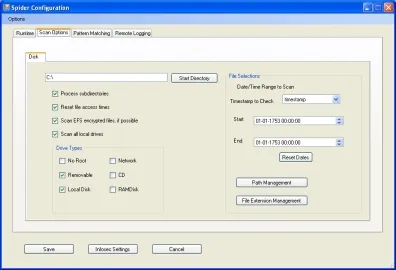
- Important Note: The order of priority the File Selections settings take is as follows:
- Extensions to Scan (found in File Extension Management)
- Paths to Skip (Path Management)
- Extensions to Skip (File Extension Management)
- For example, a path in the Paths to Skip list will be scanned if it contains file types defined in the Extensions to Scan list.
- To truly skip a path, the only course of action is to empty the entire Extensions to Scan list, remove the "*" entry in Paths to Skip, and allow Spider to scan every file-type it comes across (though you can modify that with the Extensions to Skip list).
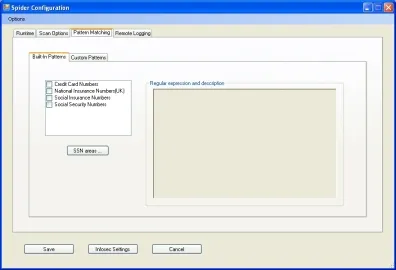
This tab allows you to choose what types of PII Spider will flag during its scans. Spider comes with several robust built-in patterns. Clicking on each one will produce a brief description on the right panel. Via the Custom Pattern sub-tab, using regular expressions you can specify a specific pattern to search for, either in conjunction with or instead of the Built-In Patterns.
Gives you options for sending your scan results to remote servers as they happen. It is not recommended you enable this feature unless you can ensure a robust, secure client-to-server framework.
Saving Your Configuration
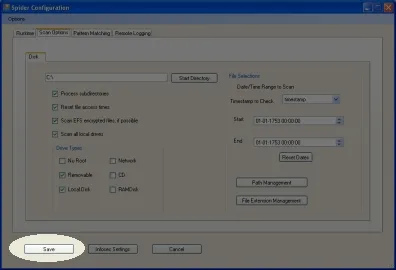
To save the settings for just THIS scan, hit the Save button on the bottom and close the Configuration dialog. You are now ready to run a new scan (See the User Guide for your version of CUSpider)
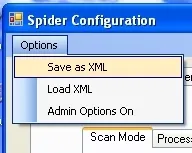
To save the settings to a new settings file, go to Options > Save As XML and choose a new file name.
To save the new settings as the NEW default settings that CUSpider will load each time it starts, save the file as C:\Program Files\Columbia University\CUSpider\default.xml (make sure you have the appropriate file permissions to save to that path).
- WARNING: this will change the default settings that CUSpider will load each time. You can use the "Infosec Settings" button to load the Infosec-recommended settings into the dialog at any time. However, to make the "Infosec Settings" the default again, load them in the dialog and then save them as default.xml.
Loading a Configuration File
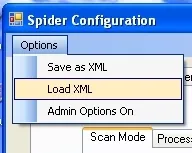
To load a custom settings file, go to Options > Load XML. When the file is loaded click on Save and close the dialog box.
To load the Infosec recommended settings at any time, click on "Infosec Settings".
- If you have replaced the default settings file and wish to restore it to Infosec default settings, click on "Infosec Settings" to load the settings, then click on File > Save As XML to save them to C:\Program Files\Columbia University\CUSpider\default.xml.
About Spider State Files
Both Spider2008 and CUSpider automatically create encrypted databases called State Filesduring each scan that detail what files have been searched, which files have been found to have sensitive data, and what that sensitive data was. Spider refers to these files when performing multiple scans within a brief time period (within an hour), and you may find it useful to refer back to them as a log of past scans. However, by design, these State Files are a road map to the very sensitive data you are trying to protect and should be treated with the same care and security you treat any other sensitive files. The Infosec team recommends securely deleting the State Files after every scan and remediation session to ensure that the data you just secured remains secured.
State File Information and Tools
CUSpider v.1.01. Parker stores it's state files at
-
C:\Documents and Settings\[your windows login]\Local Settings\Application Data\Spider\State
As of CUSpider v.1.3.1 Reilly, the way that CUSpider handles the saving of state file has been altered.
- The ...\Application Data\Spider\State directory should only be used to hold temporary, live, and partial State Files. No permanent storage of State Files should remain at that location.
- State Files that are permanently saved will be saved by the user at a location of their choice (though CUSpider has created and defaults to a My Documents\My CUSpider Scans\ directory for convienence).
The CUSpider package contains a tool called State File Eraser. This utility will securely delete the State Files, using the open-source program called Eraser, in a way that makes sure that the files cannot be recovered using a forensic recovery, or undelete, program.
Eraser is maintained and released by The Eraser Project under the GPL and works by overwriting the physical area of the disc where the bytes of the file were kept, multiple times. To find out more about Eraser and the Eraser project visit http://eraser.heidi.ie/. You can run the original Eraser program, by going to the CU Spider Scanning folder in your Programs Menu.
The State File Eraser program will be activated automatically every time you close CUSpider. It will ask you if you want to delete any State Files that Spider has generated. If you allow it to, it will search the default State File storage folder for State Files and securely erase them. If it cannot find the default directory, it will ask you to select a new one to search.
- Note: If the default directory exists, but it is empty, State File Eraser will assume there is nothing to erase and finish. It will not ask for another directory to search.
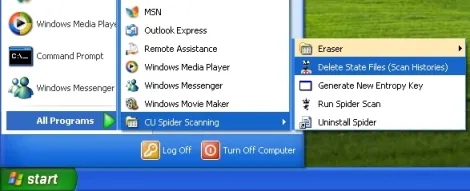
You can also run the State File Eraser yourself at any time by going to the "CU Spider Scanning" folder in your Programs Menu, and clicking on "Delete State Files (Scan Histories)".
State Files generated by Spider are *lightly-encrypted* using a file called "entropy", which is stored in Spider's program directory. The entropy file is a key to unlocking the state files, and should be unique to each user. If someone has access to both your entropy file and your state files, they will be able to decrypt and view your State Files.
Entropy files are stored at the following locations:
- v.1.0.2: C:\Program Files\Columbia University\CUSpider\entropy
- v.1.3.1: C:\Documents and Settings\[your windows login]\Local Settings\Application Data\Spider\entropy
As you can see, starting with v.1.3.1, CUSpider has begun giving each individual user their own personalized entropy key in order to increase security. If you are upgrading from v.1.0.2, make sure to hold onto the old entropy key if you wish to read state files created with that version.
If you wish to change your default entropy key, you can use the Entropy Generator utility discussed below, or you can create or designate your own entropy file. The entropy file can be any type of file (JPG, PDF, anything). Simply manually rename your new keyfile to "entropy" and place it in the appropriate directory.
If you wish to change the entropy file for just a single state file, you can use the Change State DB Password feature in Spider. On the main screen, click on File > Change State DB Password. Specify the the state file you wish to modify, the old entropy file (typically "entropy" in Spiders program directory), and the new entropy file.
Notes:
- A bigger entropy file will not in any way affect the strength of the State File encryption.
Using the Entropy Generator tool, CUSpider generates a new, pseudo-randomized 2KB entropy file with each installation. This guards against two installations having the same "key", and thus access to each others State files. While the Entropy Generator utility is run automatically at installation or first use, you can choose to run it at any time* by going to the "CU Spider Scanning" folder in your Programs Menu and clicking on "Generate New Entropy Key".
- WARNING: Once you generate a new entropy file, you will NOT be able to view or load ANY previous State Files. All the information stored on them will be effectively lost to you.
- The Generate New Entropy Key utility may only be run if you have sufficient permissions to write to the appropriate directory. If you do not have said shortcut, it is probable that you do not have the appropriate permissions. Contact your system administrator if you believe that your entropy key has become compromised or corrupted.